
BP210P Practical 2 (B. Pharmacy Second Semester): Create an HTML Page to Show Personal Information. This comes under the subject Practical Computer Applications in Pharmacy. The theory code of this subject is BP205T, and the practical code is BP210P.
BP210P Practical 1 – Design a Questionnaire Using a Word Processing Package
Solution: In BP210P Practical 2, you have to create an HTML web page; inside this page, you have to display your personal information on the web browser using HTML tags. Here, you need to create a simple HTML page. You are not from an information technology background; you do not need to use much technology. You have to follow all the steps given below.
In the BP205T theory subject (Computer Applications in Pharmacy), you will be taught about HTML, and you will be taught about important HTML tags that are useful for creating web pages. With the help of all these tags, we will learn to create HTML pages that display your personal information.
BP210P Practical 2 – Important Tags to Create an HTML Page to Show Personal Information
Below you will see some important tags of HTML along with their information, which we are going to use to create a personal information HTML page.
- <!DOCTYPE html> = Is a DOCTYPE declaration in HTML and provides information about the document type to the browser.
- <html> = This tag represents Hypertext Markup Language.
- < > = Open Close
- </> = Close & End of the tag
- <head> = The head part acts as a header of a file and contains some information, like setting the title of the web page.
- <title> = It is used to set the name of the web page.
- <body> = Body tag contains the contents that are displayed on the web page.
- <h1> to <h6> = Heading, Subheading
- <p> = This tag is a fundamental element used for creating paragraphs in web development. It helps structure content, separating text in0to distinct blocks.
- <br> = This tag causes a single line break. Generally, it is kept at the end of every line.
- <nobr> = If we don’t want such a break, then this tag can be used for such text.
- <pre> = This tag is used to preserve the white spaces and lines in the text.
- <div> = This tag is used to make division of sections in the XHTML documents.
- <div align=”?”> = This tag with an attribute is used to specify the position of a division on the web page.
- <b> = To make words bold
- <i> = To make words italic
- <strong> = To make strongly emphasised text.
- <strike> = To make striked text.
- <table> = For adding a table to a web page.
- <table border =?> = To set table border size.
- <tr> = It defines a row in a table.
- <th> = It defines the heading cells in the table.
- <td> = It defines a data cell in the table.
- <img src=”url of the image”> = To add an image on the web page.
- <img src=”url of the image” width=”?” height=”?”> = To add an image on the web page.
-   = This is used for giving a single space between words.
-   This is used for giving 4 spaces between words.
BP210P Practical 2 – Create an HTML Page to Show Personal Information
To create an HTML page, follow the steps given below.
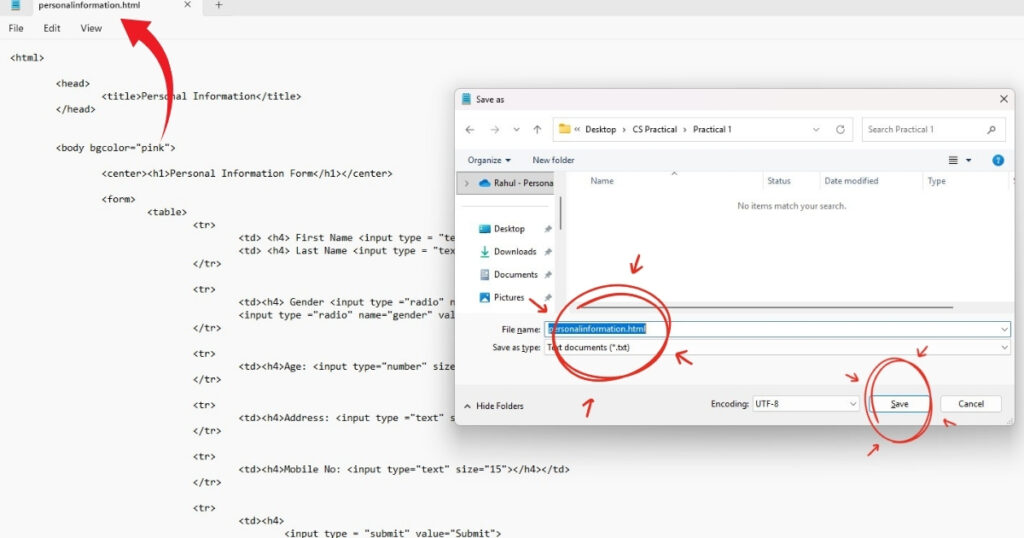
Step 1: Open Notepad and type the following code to create an HTML web page. Download the HTML code from the link given below and copy it into Notepad. Save it with the .html or .htm extension.
Step 2: In Notepad, you will see the File menu option on the top left. After clicking on the file, click on the Save As menu and save that HTML code. The file has to be saved as .html or .htm. For example, PersonalInformation.html or PersonalInformation.htm.
The screenshot below shows Notepad and how the code in it is actually saved.

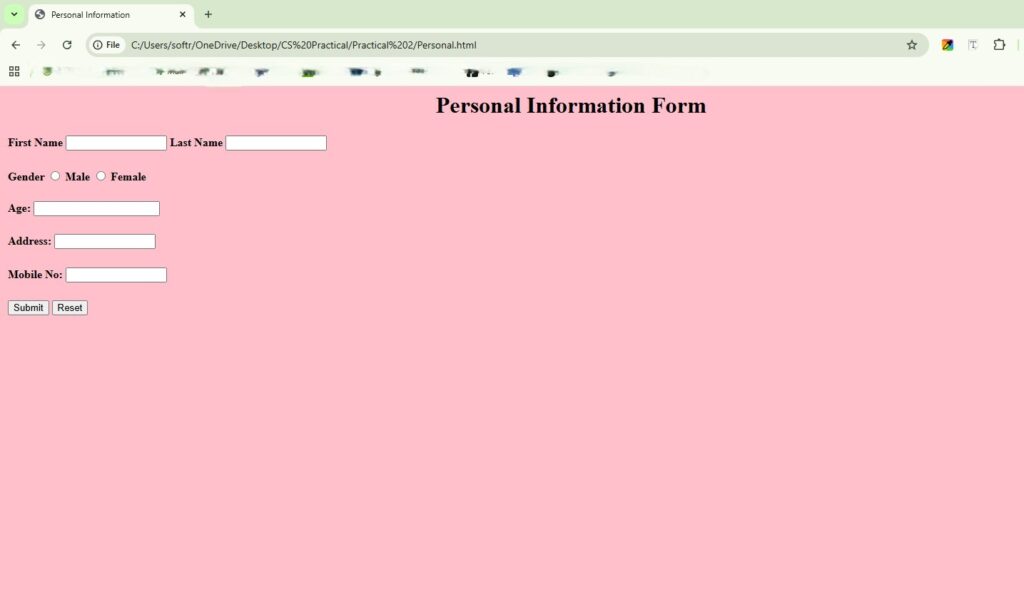
Step 3: Open a suitable web browser, such as Chrome, Firefox, or Internet Explorer, and type the name of the HTML file address bar. The actual output will be displayed in the browser window.

BP210P Practical 2 – Program Explanation
In the code as given in step 1,
- We have written the HTML code within the …</html> tag. In HTML, the tag is written within the angular bracket.
-
The general structure of any HTML document is as follows:<html><head></head><body></body></html>
- The <title> </title> tag is for representing title of the Web page. It appears at the top of the web page.
- The <table> <table> tag is used to create a table on the web page. <tr> tag is used to create a row and <td> tag is used to create the columns of the table. Note that – first <table> tag is used within it <tr> is used and within it <td> tag is used. The h1,h2,…, h6 are header tags to display the contents in bold, bigger font size.
- For creating a form <form>…</form> tag is used.
- To create text box <input type=”text” …> tag is used. (For example – For Last Name, First Name, Address and so on we have used text boxes, so that user can enter his/her personal information accordingly).
- To create a radio button we use <input type=”radio” …>. For example in above HTML program, for Gender we use radio button.
- To create Push button <input type=”Submit”…> or <input type=”Button”…> are used. The Submit and Reset buttons are created using these tags.
Similarly, you have to complete the Pharmacy 2 practical by writing the code. You will understand the complete process of creating a personal information page using HTML by reading this post. So see you in the next practical 3.